How to Guide – ShockRite Solar Energisers
Our ShockRite Solar Electric Fencing Energisers are very user-friendly, but everything is easier to understand with some ‘how to’ instructions and photos to guide you. Check out:
- How to set up a solar electric fence using a ShockRite Solar Energiser
- How to replace the ShockRite Solar Energiser’s battery
- Solar Energiser Battery Life and Care
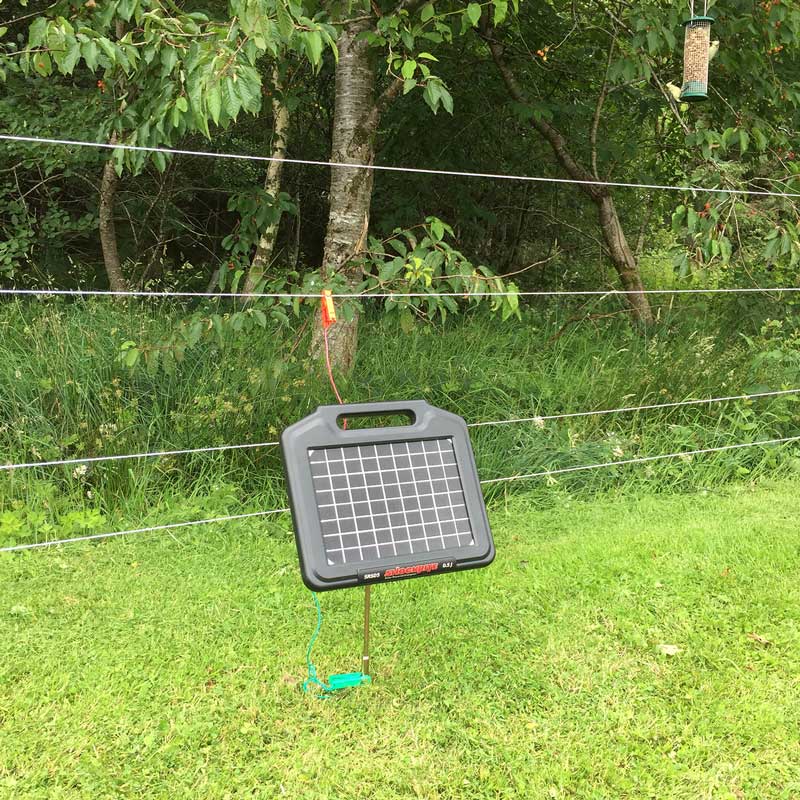
How to Set Up a Solar Electric Fence Using a ShockRite Solar Energiser
Step One
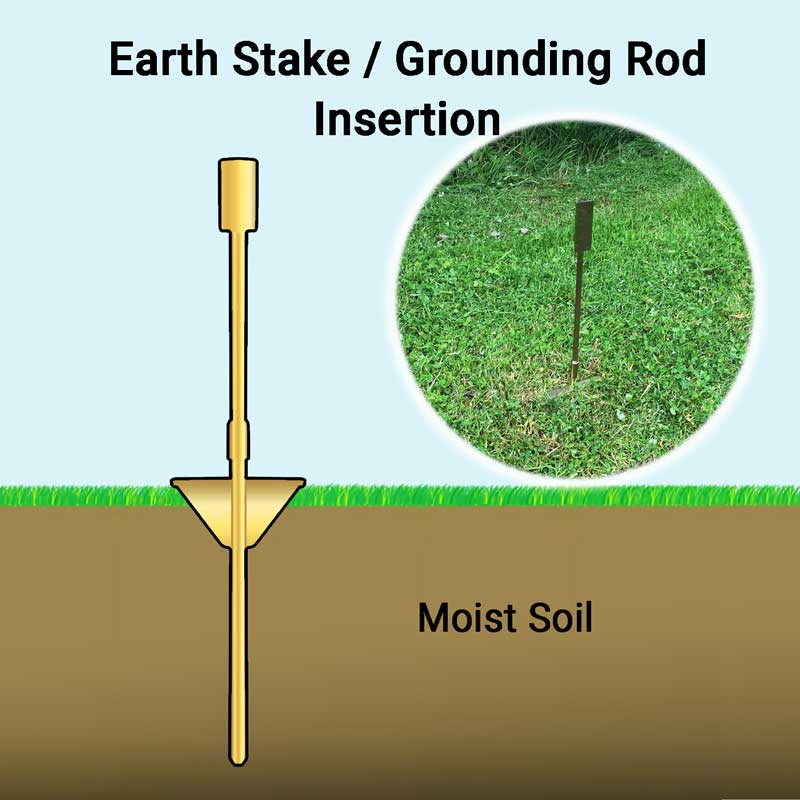
Assemble earth stake by screwing both halves together.

Step Two
Insert earth stake into the ground as shown.
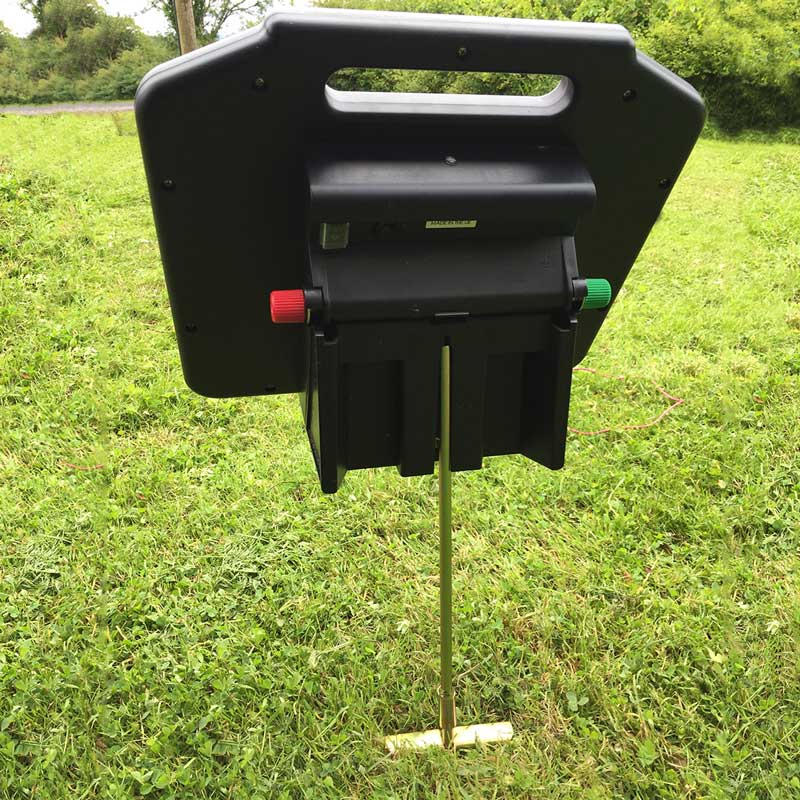
Step Three
Mount solar energiser onto earth stake by slotting into place.
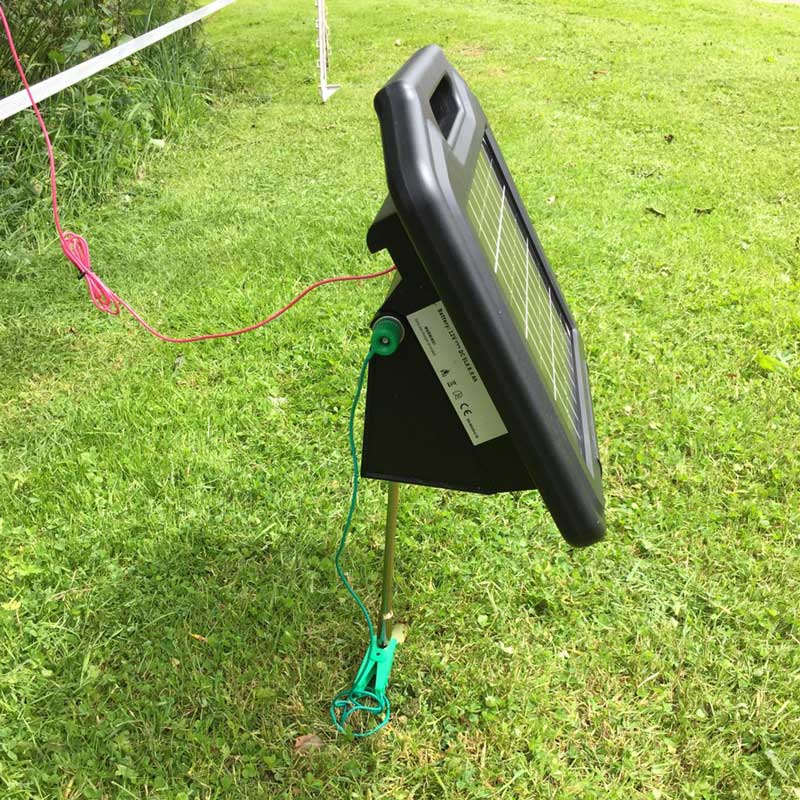
Step Four
Unscrew green nut on the energiser, attach ring-end of green cable and replace green nut. Attach the green crocodile clip to the earth stake.
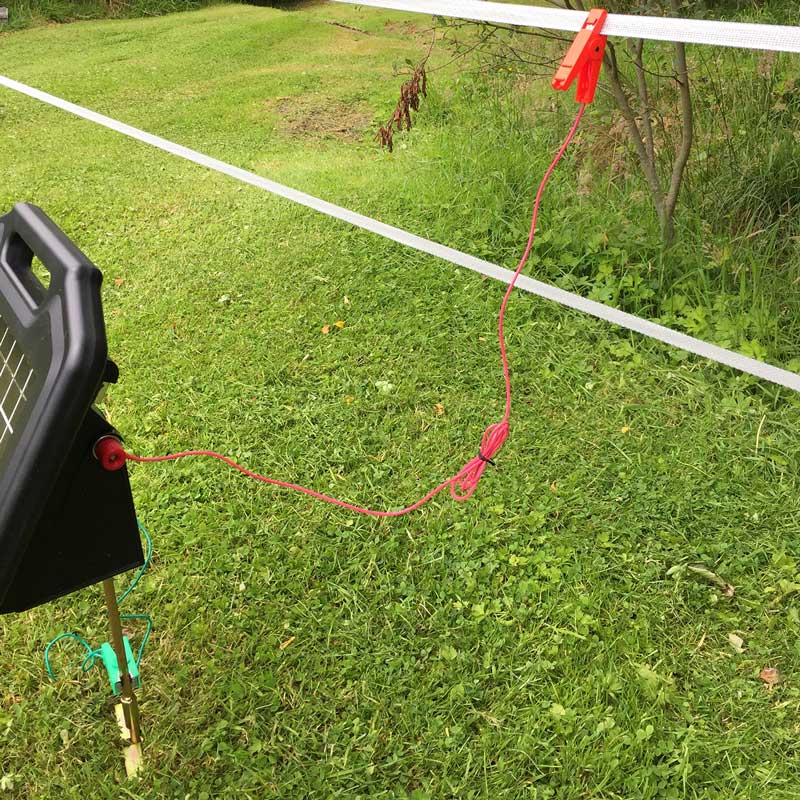
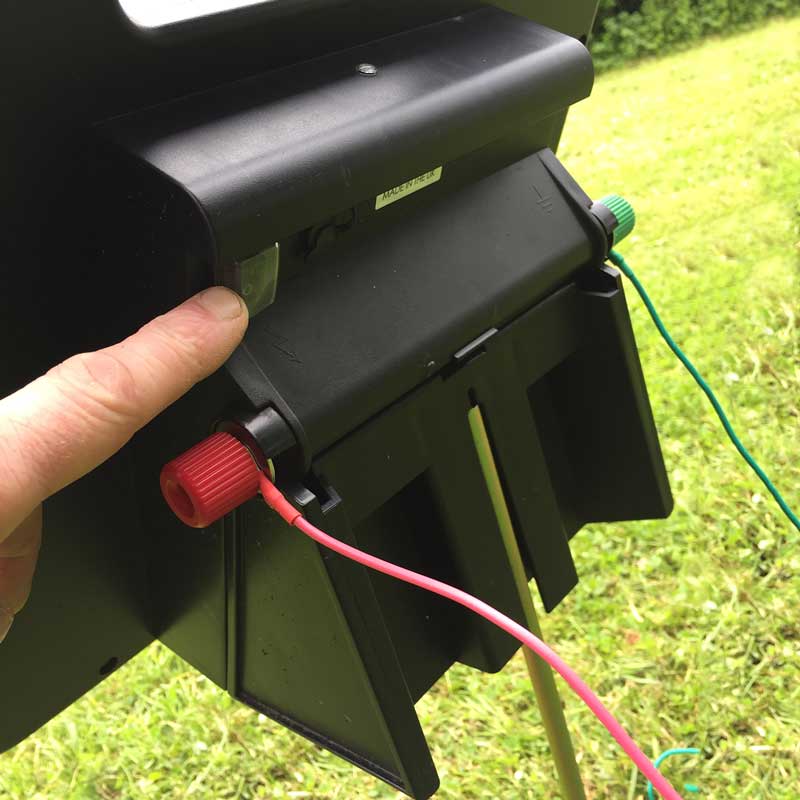
Step Five
Unscrew red nut on the energiser, attach ring-end of red cable and replace red nut. Attach the crocodile clip end to the fencing conductor (which is usually wire/tape or rope).
Step Six
Turn on your solar energiser using the on/off switch located on the back.
Step Seven
Check the pulse indicator light to ensure that the energiser is on.
Step Eight
Congratulations, now you can stand back and appreciate your first steps to becoming an electric fencing expert 🙂
View our Solar-Powered Electric Fence Energisers and Kits here.
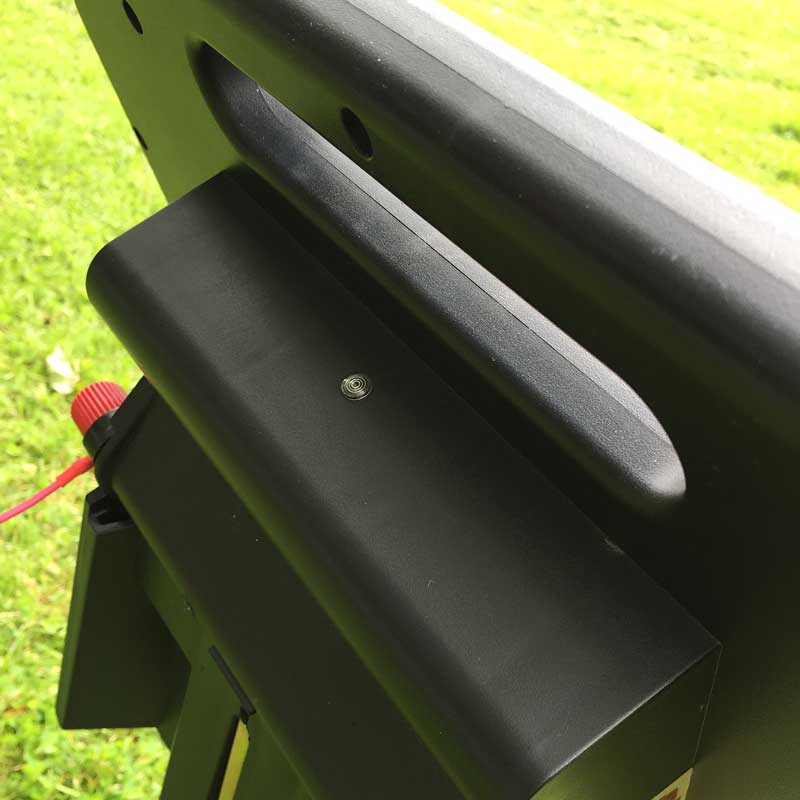
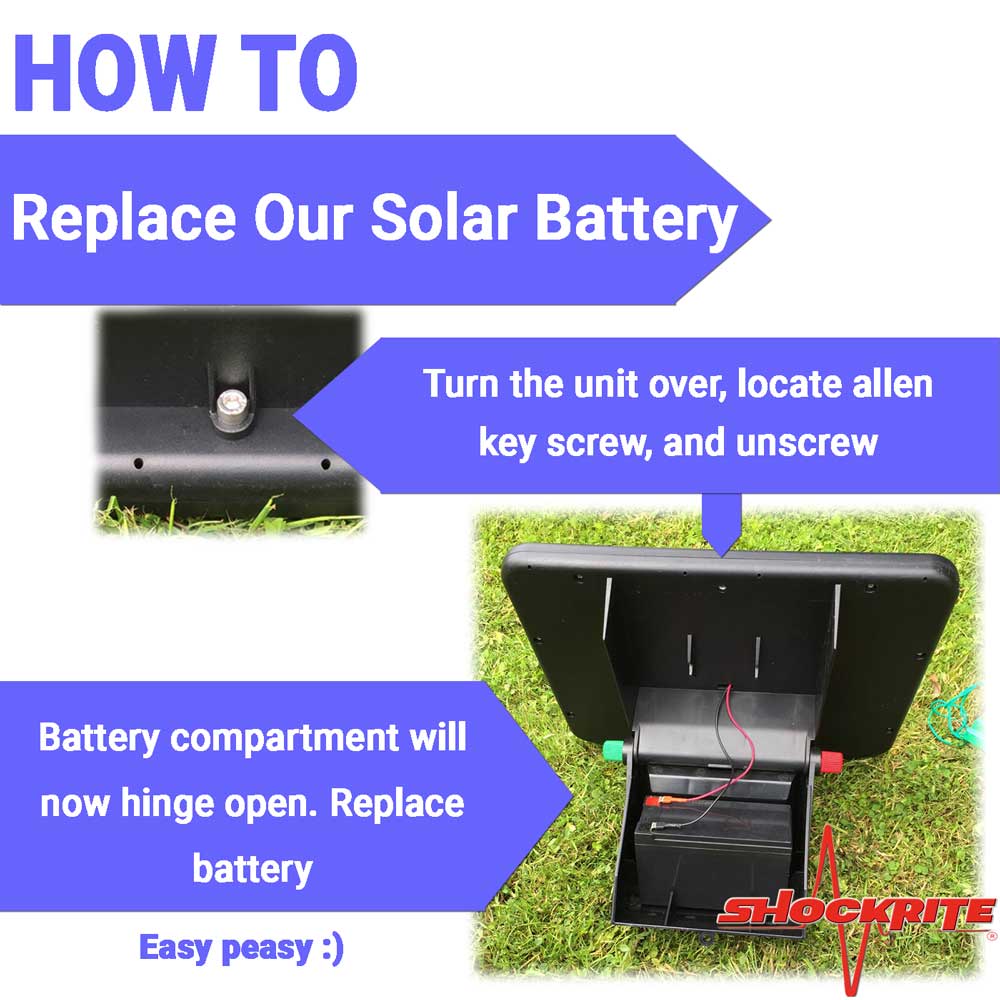
How to Replace the ShockRite Solar Energiser’s Battery
The solar energiser battery will charge at every opportunity due to the large 10W solar panel, but like all batteries they will eventually reach the end of their life and need to be replaced.
The ShockRite solar energisers are designed to make this as easy as possible as shown below.
Solar Energiser Battery Life and Care
The ShockRite solar battery life can last multiple years but this is largely dependent on the battery care.
The battery needs to be charged when the battery voltage is critically low, and the low battery indicator shows RED (this normally only occurs in the depths of winter as the large 10W solar panel will power the energiser during the brighter months).
If the battery is not charged after the LED turns red, this is when the most damage will occur to the battery.
To prolong battery life simply charge the ShockRite solar energiser (using the mains charger provided) when the red light appears.
Note: Alternatively, if two batteries are being exchanged to power the solar energiser (instead of mains charger) then please remember to charge the drained battery on removal from the energiser.
Please refer to the SRS Solar Energiser User Manual for information on solar energiser storage when the energiser is not in use.
Please send us a message if there’s anything that you’re unsure about, and we will do our best to help you out.
You can find our great value Solar Electric Fence Energisers and Bundles here and Replacement Solar Batteries here.
Don’t forget to check out our Electric Fencing Help and Advice Guide too.
Replacement mains-charging cables are also available for your ShockRite Solar in case the original one is misplaced.